| These instructions relate to using Masterspec Link with the Masterspec Standard, Structural & Civil, Services, Landscapes, Basic and Interiors Libraries. Link operates slightly differently with Masterspec Minor Residential - seperate instructions are at the bottom of the navigation. Check Headers and footers Before printing it is important to check that the header carries through the entire document and that the right-hand footer text matches the work section title. Where headers and footers are involved, one needs to understand Microsoft ® Word sections, and how headers and footers behave in general, before one can understand the fix. However once you know, you'll never want to go back; you'll probably even marvel at what nifty features they are. It is appropriate then at this point, to go into some background on the sections feature of Word. Watch out in the explanation below that you don't get sections (a feature in Word) confused with work sections.  Sectioning a word document is simply placing a marker (section break) in a document to divide it into logical parts. Note that the section break does not print. As you move through the document, the section the cursor is in will be shown on the left-hand side of the status bar near the bottom of the screen. 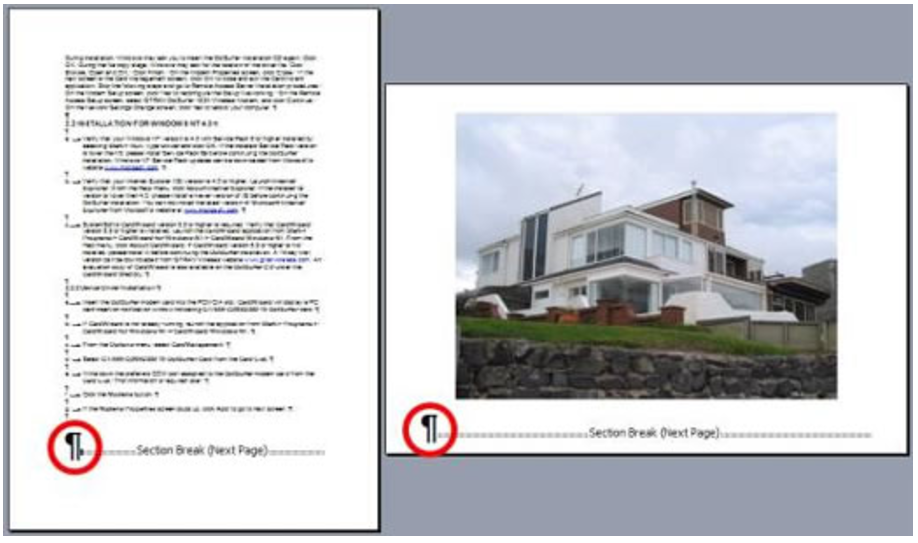 Why use sections? This can be best explained by using a specific feature as an example, like page layout. If a document has no section breaks i.e. it is one section, then applying a landscape page layout will apply to the whole document. What if you had a graphic in the middle of the document that fitted in better in landscape but you wanted the rest of the document in portrait? Well, Include 2 section breaks in the document so that it is divided into 3 sections and apply the landscape page layout only to the 2nd (middle) section. To insert the first section break, position the cursor in front of the left paragraph mark ringed in red. Go into Insert > Break , Section Break (Next Page). Position the cursor in front of the right paragraph mark ringed in red and set the second section break. To set the page orientation, position the cursor again in front of the right paragraph mark ringed in red and go into File > Page Setup > Margins. Make sure Apply to has This Section. Choose Landscape under Orientation. Click OK. Once a document is sectioned, as in the example above, Word will create a separate header and footer for each section. So in the document above, 3 sections means there are 3 headers and 3 footers (they're empty at present). These footers and headers can be edited independently. This serves Masterspec's purposes as we require the text of each work section's footer to match the title of the work section i.e. the footers require different text. Now let's consider the headers. In the example above we have 3 headers that can be edited independently. What if we wanted only one piece of text to be in all 3 headers i.e. one header for the whole document? We must not delete the section breaks to get back to one physical header as this would mess-up the footers. So Word provides another facility where you can 'link' headers (and/or footers). So with linked headers, although you have separate headers, what you type in the one will be replicated in all the others. The following diagram represents the header and footer setup of a sample Masterspec specification - all footers 'disjoint' and all headers 'linked'. 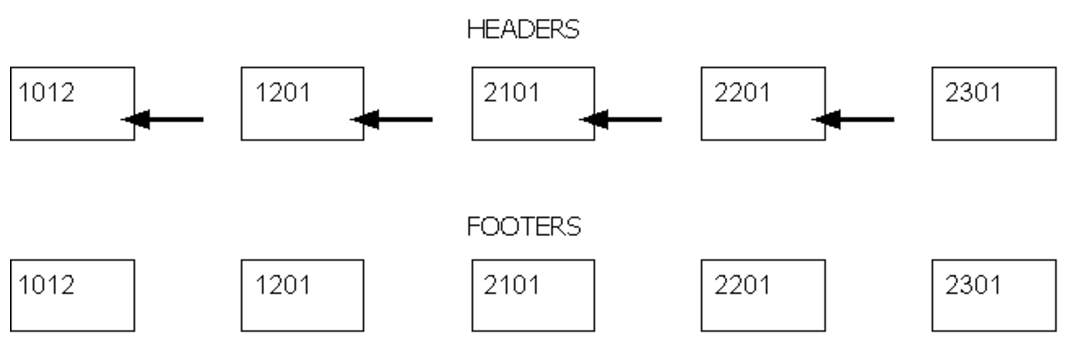 Notice that the linking is unidirectional and the headers/footers can all be linked or some can be linked while others not i.e. if we unlink header 1201 it will be unlinked from 1012 but will remain linked to all the headers of 2101 and further down the document. 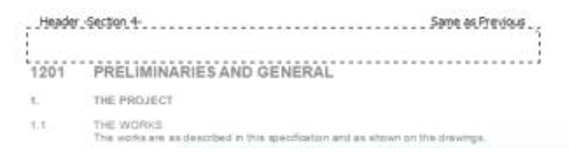 To link/unlink headers or footers position the cursor anywhere within a section whose header or footer needs adjusting. Go into View > Header and Footer. If there is a Same as Previous on the right hand side above the header then it is linked (no text means it is unlinked).  To change from linked to unlinked or visa versa click on the Same as Previous button (ringed in red above) on the header and footer toolbar. So when attempting to fix header and footer problems check the following 3 things in the order given: - There is a section break between the work sections. (A page break is different to a section break).
To re-insert a missing section break either run Repair Document - Validate Sections or do it manually as described above. - The header/footer is linked or unlinked where appropriate.
Owing to the unidirectional nature of the linking start at the back of the document and work forwards. - The first two checks are in place but the header/footer text is still incorrect.
Open the header/footer and manually correct the text. Next.... |