| These instructions relate to using Masterspec Link with the Masterspec Standard, Structural & Civil, Services, Landscapes, Basic and Interiors Libraries. Link operates slightly differently with Masterspec Minor Residential - seperate instructions are at the bottom of the navigation. Deleting a clause When customising, all non-applicable clauses must be deleted. Make sure that if it has a guidance note it is deleted as well. The best way to achieve this is with guidance notes displayed. However if guidance notes are off, select the clause and the empty line that follows (the guidance note is 'attached' to this line). 
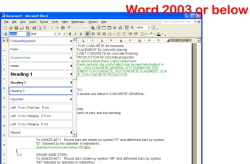
Do not include the empty line before the clause; this line could contain the guidance note of the previous clause. Adding a clause When adding a clause the clause title must be given a Heading 3 style. This is important for the clause renumbering feature (under the Masterspec tab) to work. Two ways to create a correctly formatted clause are: 1. Open an empty line and type the clause in from scratch. When complete position the cursor somewhere in the clause title. Choose Heading 3 as indicated below for your version of Word.   The body of the clause should have a Normal style. (To check this, place the cursor in the paragraph and look at the styles box as shown on the Formatting toolbar). If it isn't Normal , place the cursor in the paragraph and select the Normal style. If you have more than 1 paragraph, first select them all and then apply the style. 2. Copy and paste another clause and then type over the text. The copy process will 'bring across' all the correct formatting including the Heading 3 for the title and normal for the body of the clause. Work with guidance notes on so that you avoid selecting and copying any guidance notes. Next.... |